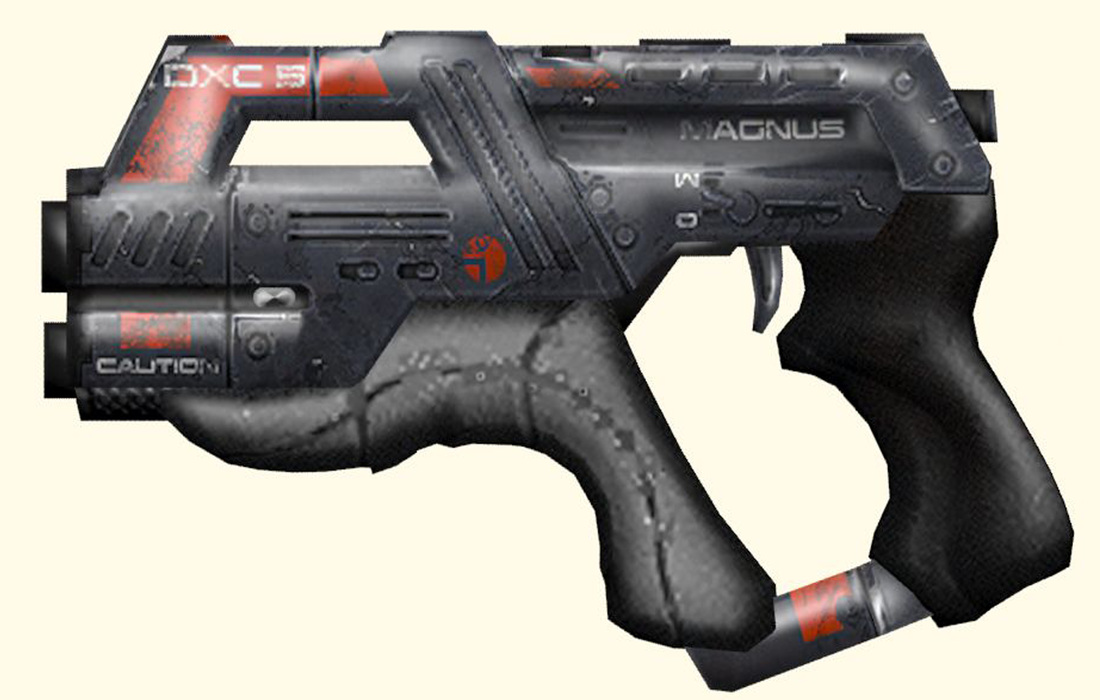
 Yes, yes, I know: the title says Paladin, the picture says Carnifex. The two guns are 100% identical, besides the paint and decals though, so I'm sure you'll forgive me this slight oversight. ;) Anyway, got commissioned to do an M77 Paladin out of foam. Relatively simple, though due to all the open areas in the middle of the gun, I opted to try out a different method. 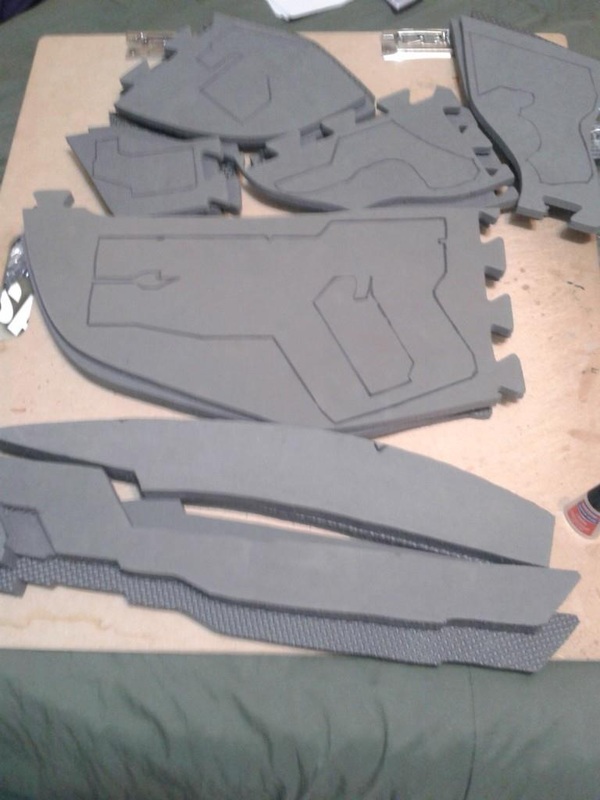 In the pile of foam at the top of the picture, you can see I'm still layering it to cut out all together, but it's a little more puzzle-pieced than the other two regulars you see below it. Makes it much easier to get to all the holes inside! Once all those layers were glued down, I cut out the puzzle pieces, glued them all together, then used the extra to cut out the small bit at the bottom of the grip. 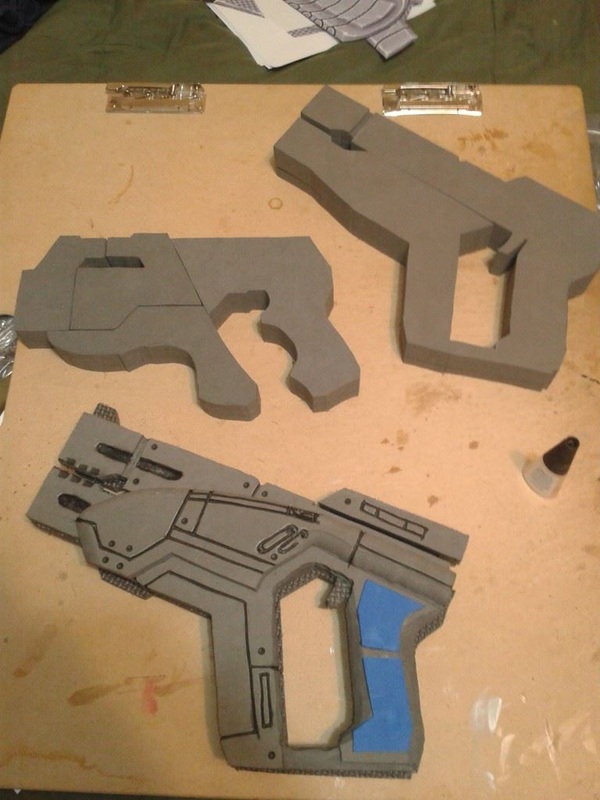 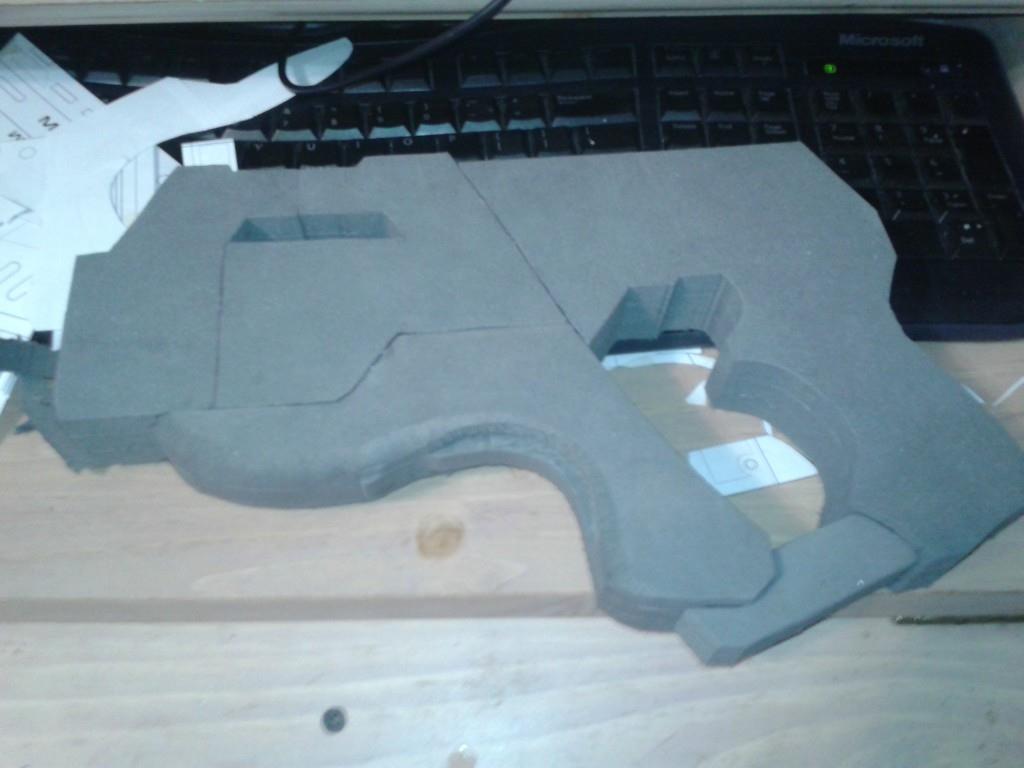 Super simple. It's remarkable how quickly this came together and how simple it really is. After assembly, I grabbed my craft foam and cut out the top layer. 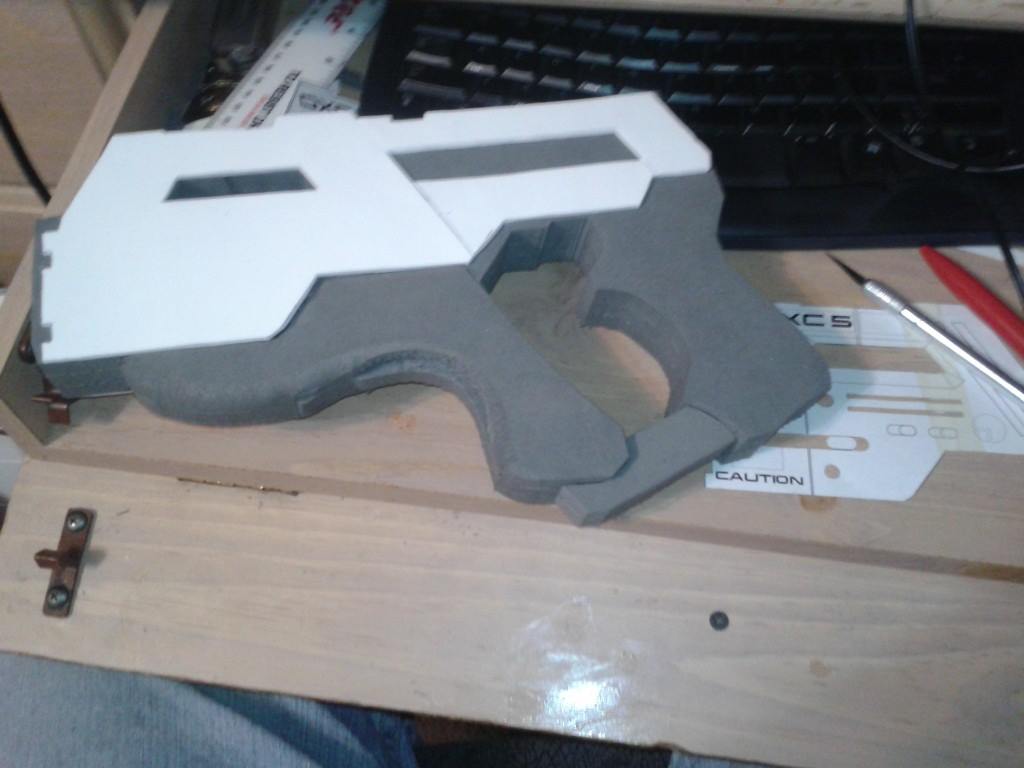 Then, I did the light scoring trick with my xacto knife and heat gun for all the details, after marking all the lines with a pen, and cut out the angled bit on the upper hole with the xacto as well. I also threw on the upper details with more craft foam, and cut out the barrels, and heat sink on the back out of PVC pipe. I covered the back of the heat sink with more craft foam. 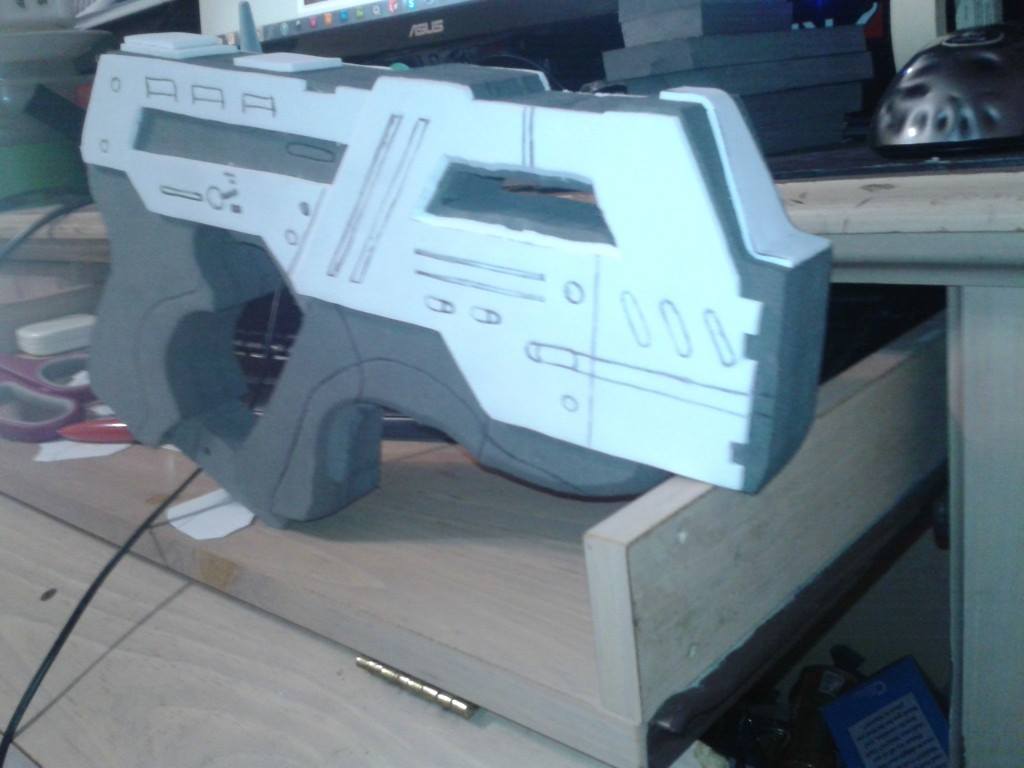 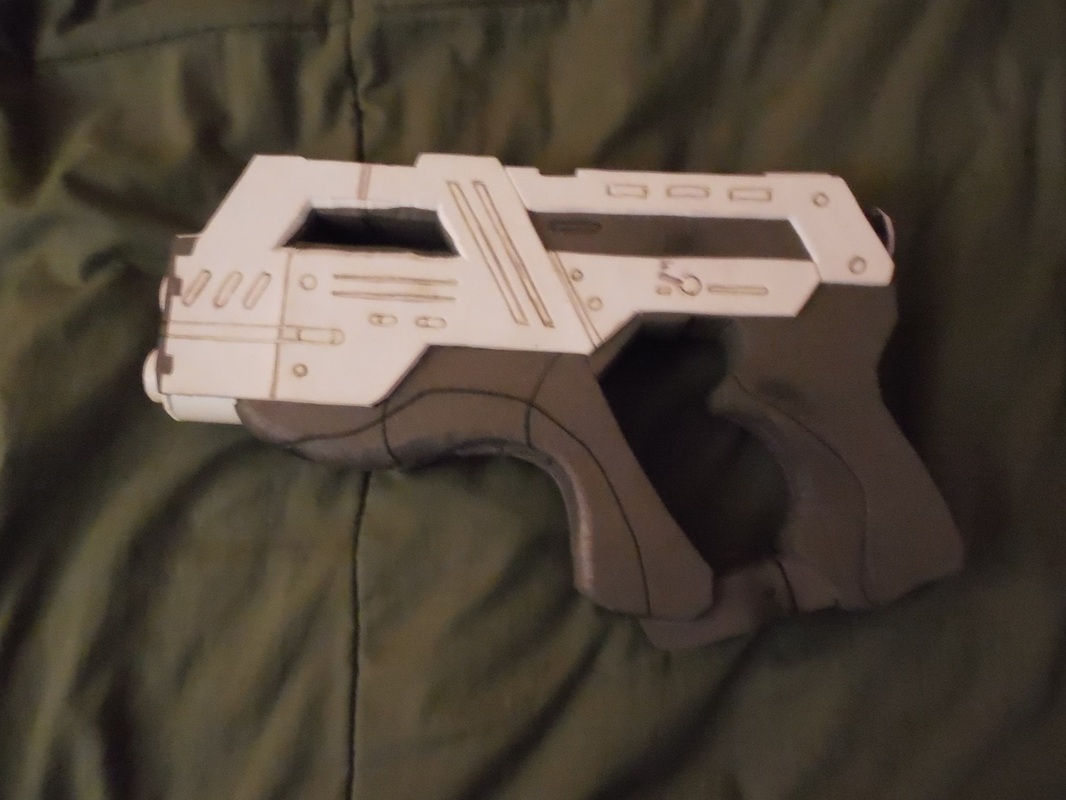 Next came the Plasti Dip! Lather, rinse, repeat. Oh, and, naturally, the paint and weathering. ;) 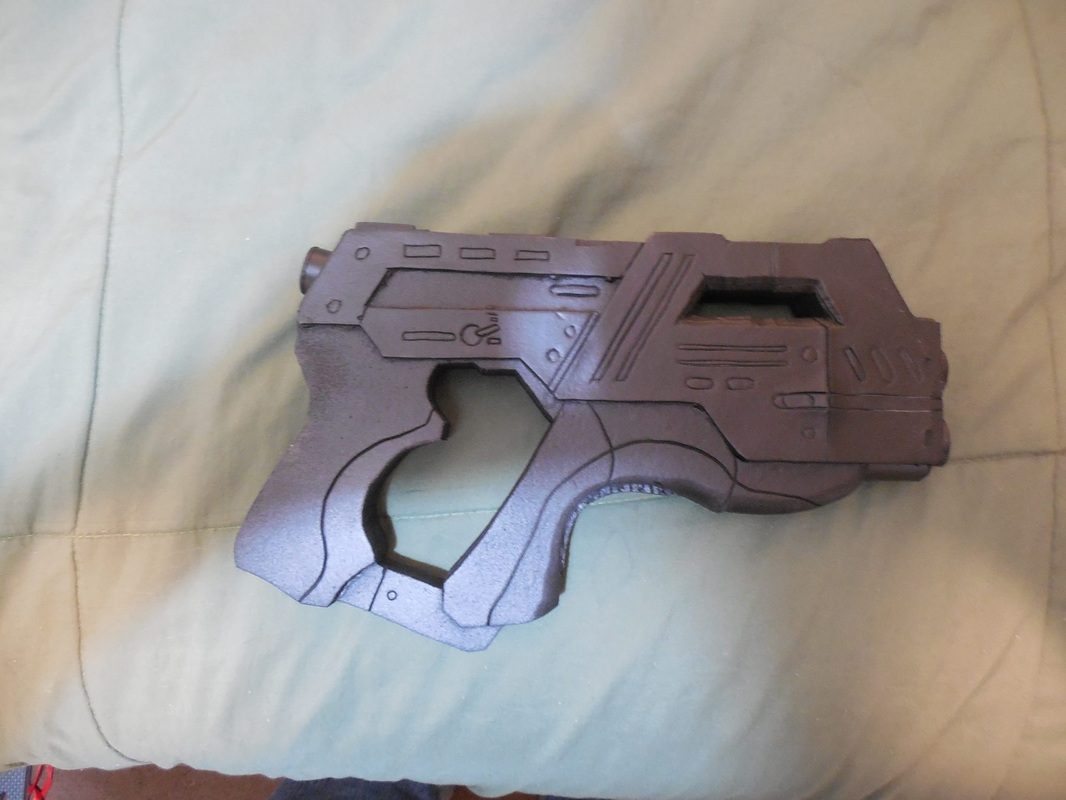 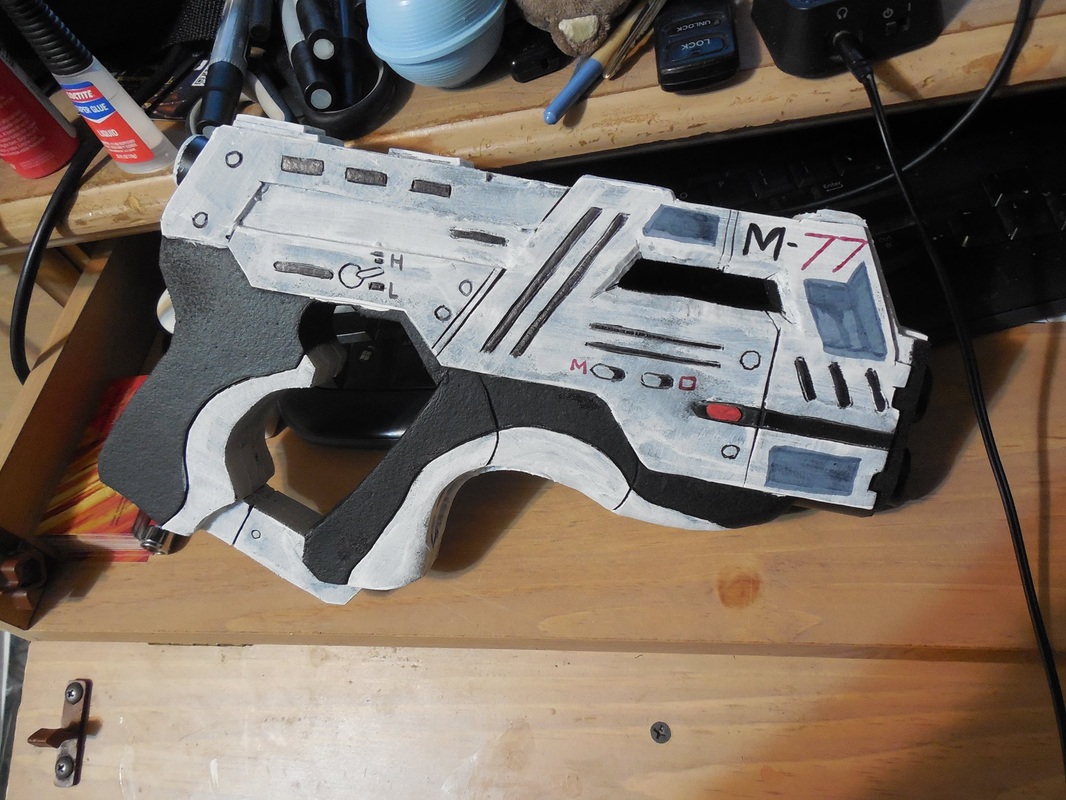 I was both surprised and happy at how quickly this build came together, and I can definitely see why most people start out by making this or the Carnifex. I'm super tempted to make a wooden master and mold a few, though there are already so many out there that I don't think it'd go anywhere. Still though! :D
0 Comments
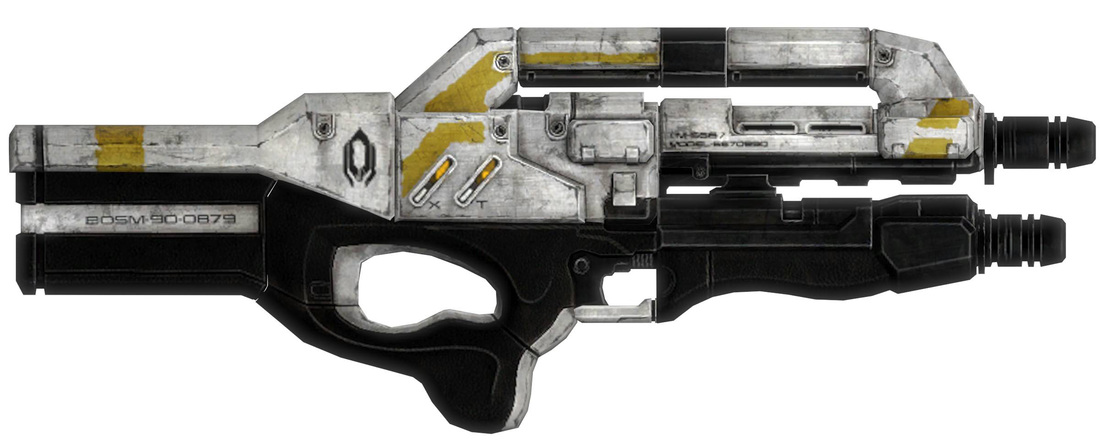
Still going, on this day of write-up catch up! Now we come to an oldie with a twist. Back in 2012 I was commissioned to make a Cerberus Harrier, which you can read the write-up for here. This time I was commissioned to make another, just as large, but they wanted a special, unique paint job: they wanted it Alliance. You'll want to click the link above to get all the meaty details on the assembly process, since I'm going to skip quite a few of the opening bits: the stacking/layering/gluing of the foam, cutting it all out, beveling the edges, and gluing all that together. Nope, I'm going to skip right to the juicy bits, since by now you should all know the steps I take to make these foam props. And if you don't, click the link above so you do, then meet us back here. ... Everybody ready? Let's go. First up, due to the move I was unable to find the alternate barrels I had made as an experiment with the first Harrier. Thanks to that, I had to make a new set of barrels, but I didn't have the PVC pipes or connectors like I did before. So, I got a little creative and blatantly "borrowed" a trick from Punished Props. 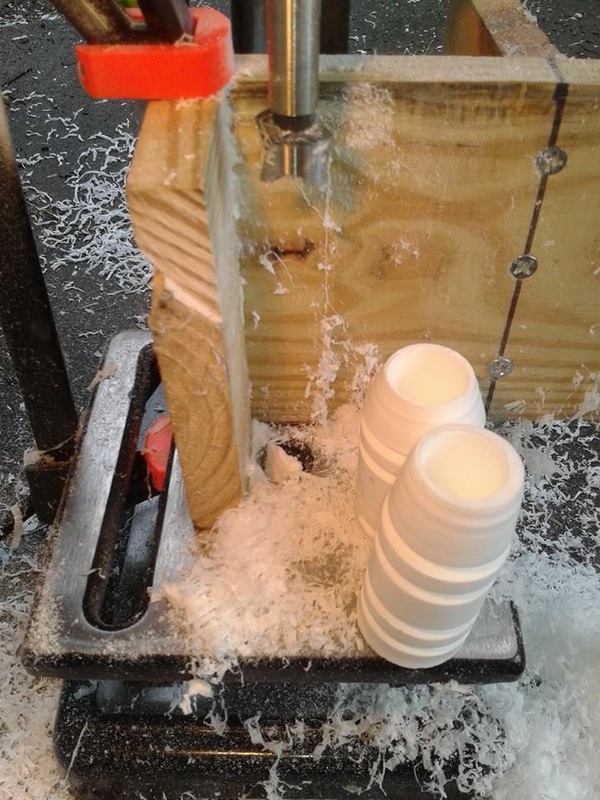
I had a couple cups full of excess casting resin, building up when I have a bit left over when I make castings. I put these on my lathe, got covered in thin white ribbons, and turned out the two barrels. Then I took them to my drill press and drilled out the holes in the fronts with a forstner bit. From there, it was a simple job attaching them to the front of the Harrier. 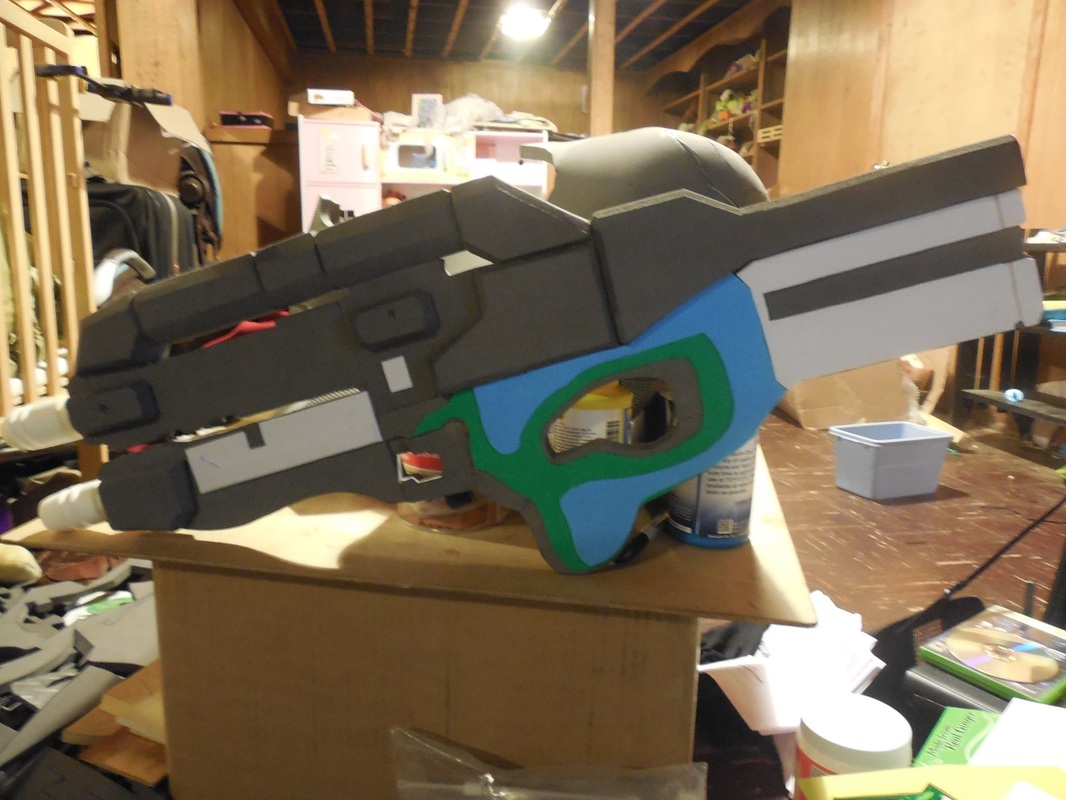
Naturally, from here came the detailing, done like the M8 version 3 and M99 Saber: light etching with the xacto knife and a heat gun to open the cut bits up a bit. Of course, then came the Plasti Dip, as always. 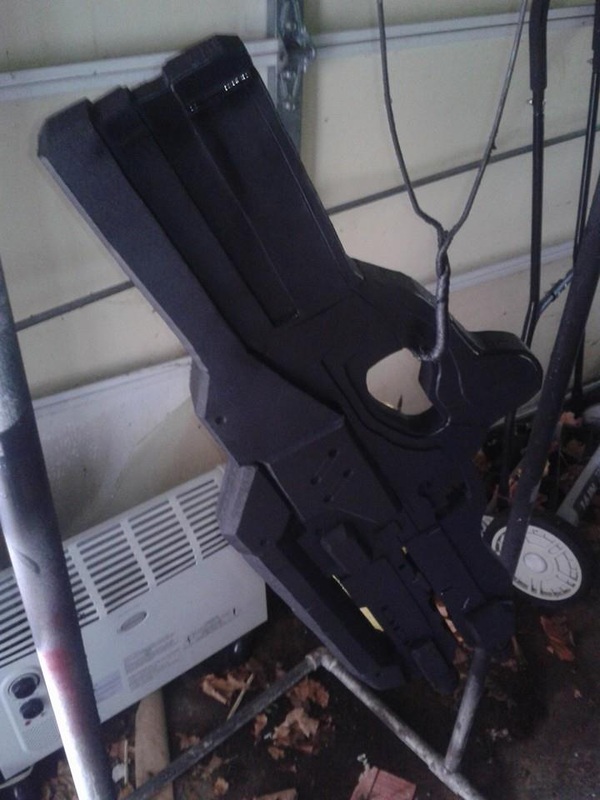
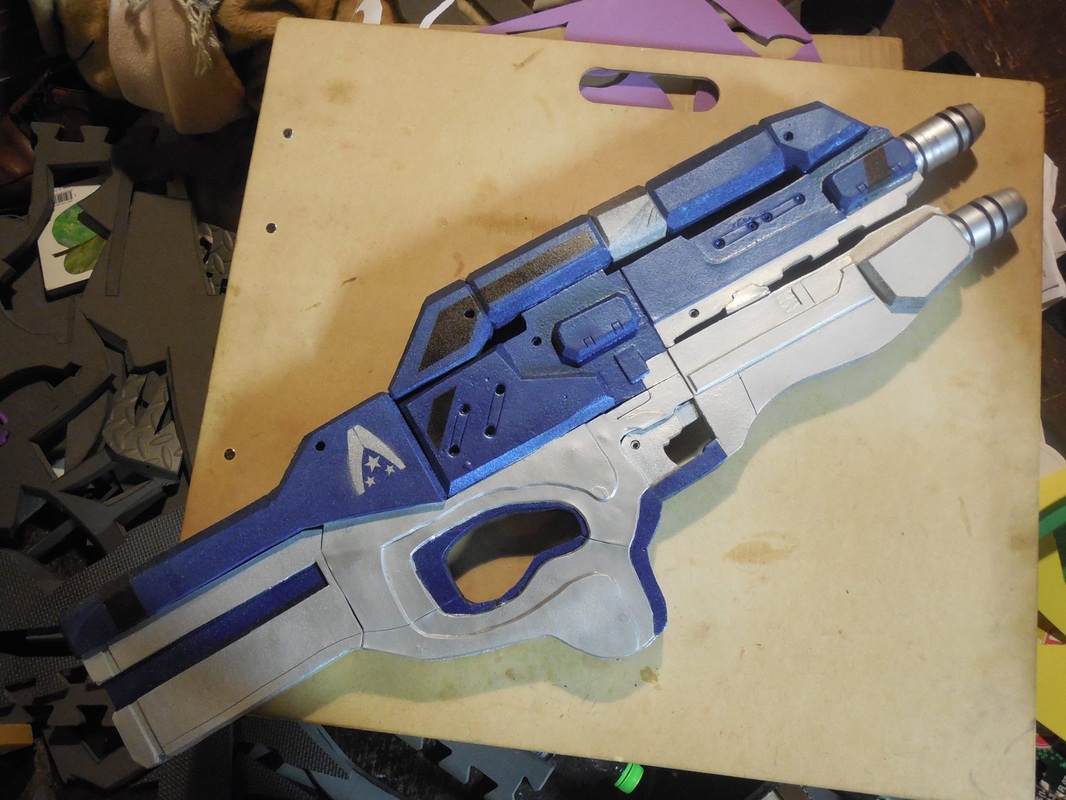
Now comes the really fun part: painting this thing the Alliance colors. Cerberus has it white, yellow, and black, with the logo on the stock. Alliance? Blue, silver, and black, and a totally different logo. That really makes things interesting, and gives it a whole different feel. First up, the bottom layer of blue. 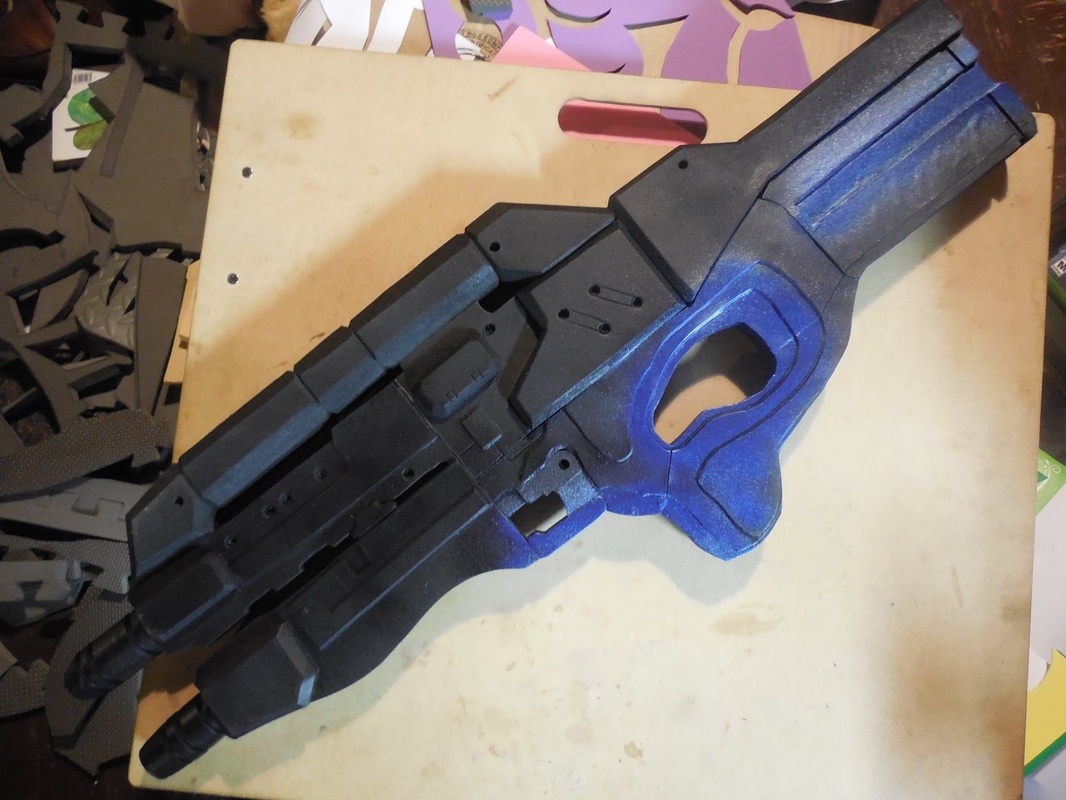
Since blue is replacing the white, and since it's easier to tape from the bottom-most layer and work my way up, I started with the bit around the thumb hole area, the front of the grip, and the slit in the stock. Then I taped those up, and covered the whole thing in silver. I don't have a picture of that step, but the next one was the same: tape up the silver for the final set of blue. 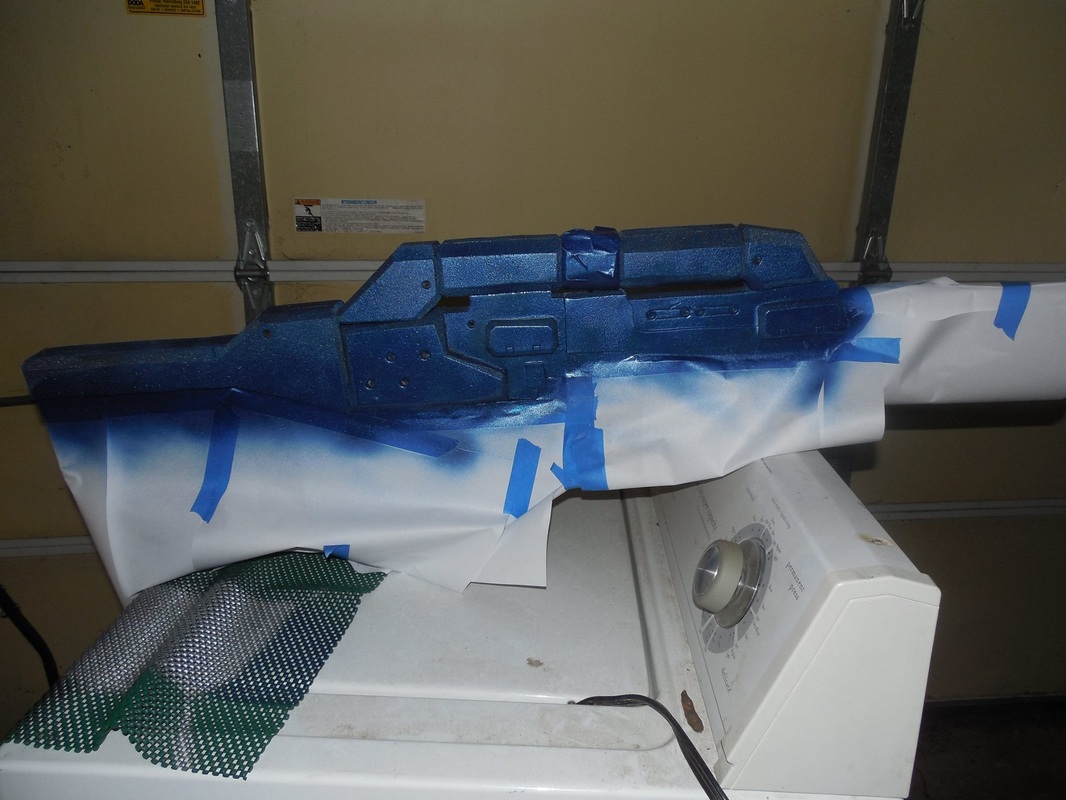
Once that all dried, I took the tape off, which is always my favorite part after painting. Totally feel like I'm opening a Christmas present to find all the awesomeness inside! And, naturally, the Alliance Harrier was no exception. Of course, I also had to tape it all back up, just to paint on the black decals and add the Alliance symbol where the Cerberus one would normally sit. 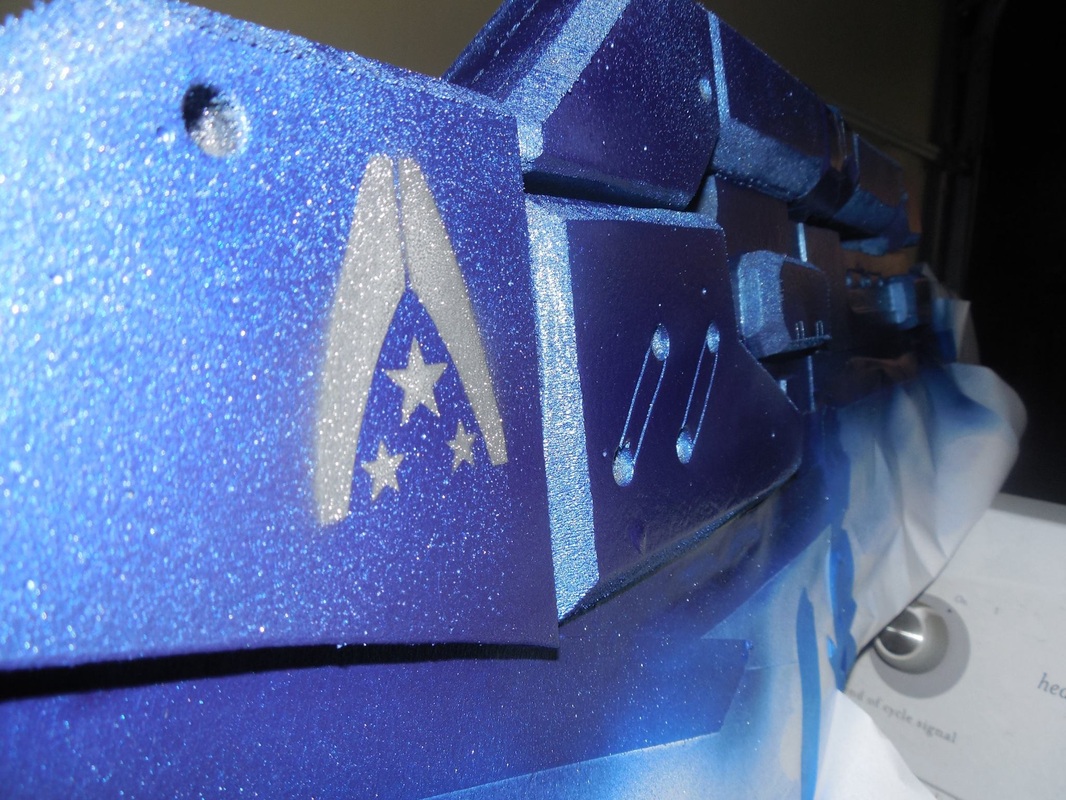
I didn't add the lettering or anything like that, because I didn't have the extra set I had made and I didn't want to etch out a whole new stencil for it. Not that it mattered, as I think it looks awesome as it is. :) Of course, now it needed to look even better, so on came the weathering! More black acrylic wash, with dry brushing various colors. I tried layering a few different colors to make the effect pop out better, and I think I'm getting better at that. Just need to work on which colors look more natural together at the end result. The final product: 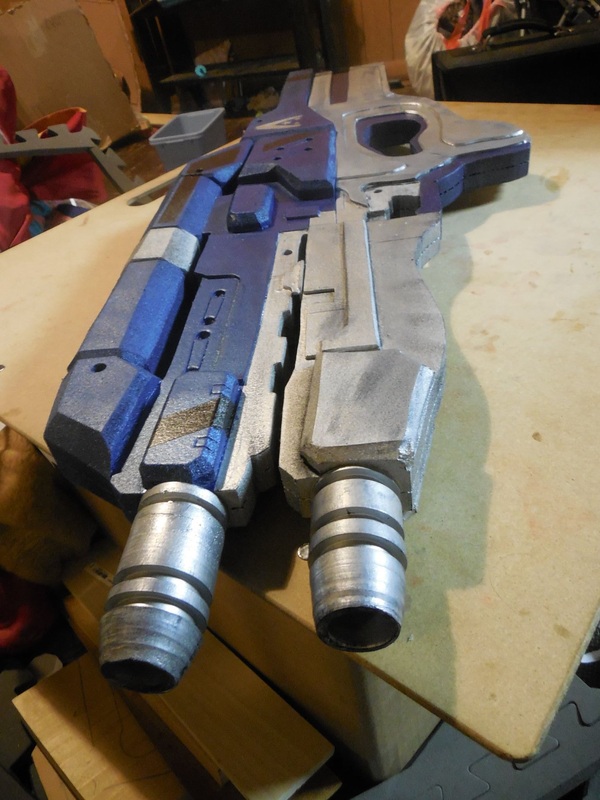
I kept it still kind-of new, like it was only recently off the assembly line - or just repainted after acquiring it on a raid or something. Still though, I'm really happy with how it turned out, and it was certainly a big hit when I revealed the alternate scheme on my Facebook page. Hope you enjoyed!
For those of you that have been following me from the very beginning, you may remember that my M8 Avenger build has taken on a couple different iterations. First, there was the super quick 3 day build one I made, Version 1: 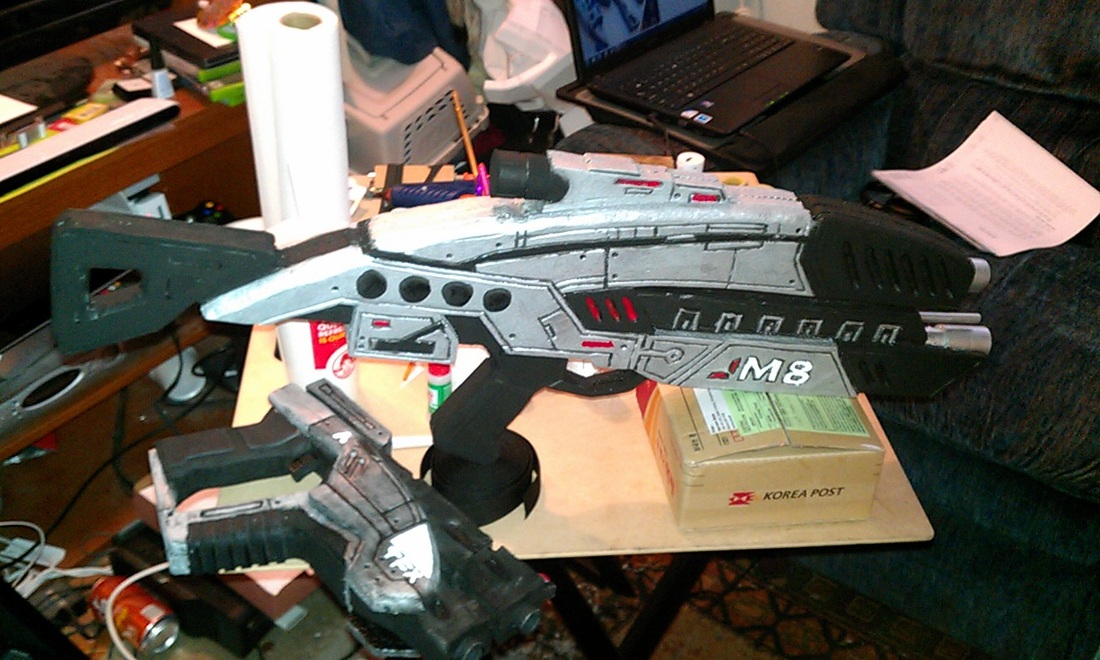
I loved it, and I loved that I had made it so quickly, but I knew it wasn't pretty, and it was anything but perfect. So, when I remade the N7 armor, I remade the M8 to go with it. Never did a write-up, but it was basically the same as the last one, just with layers of foam all glued together and cut out with the band saw. This ended up as Version 2, which has pretty much been the face of Ascension Props to this day. 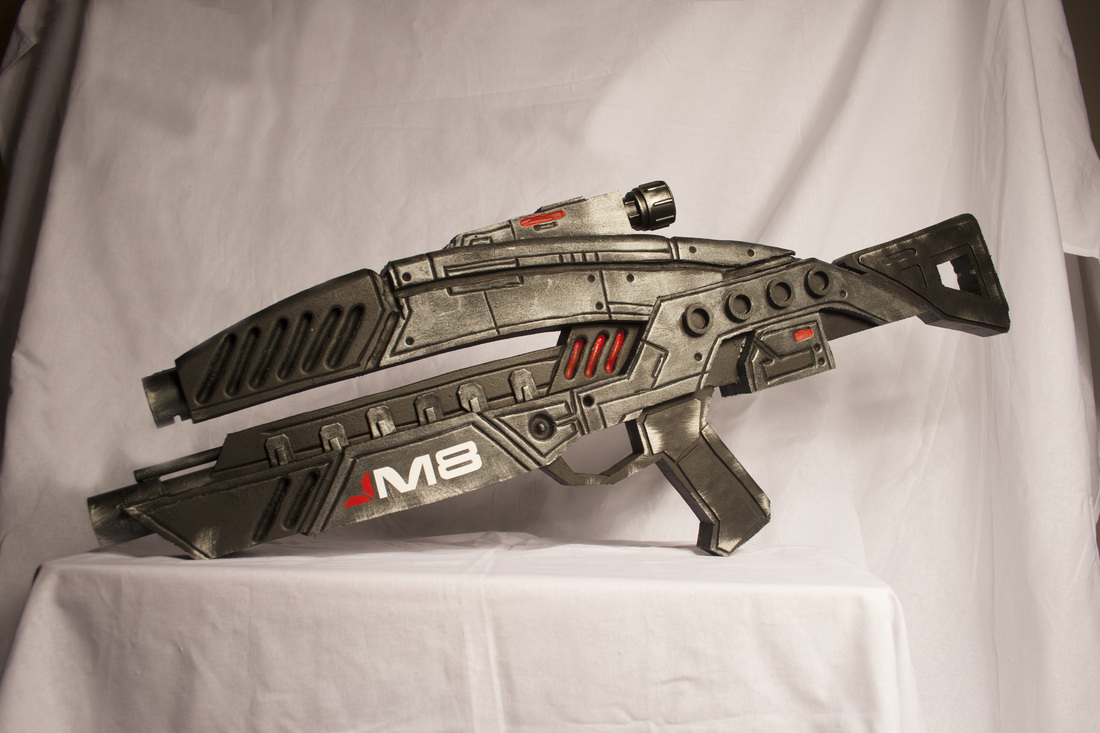
Even then, though, I knew I wanted to try to make it even more correct. A lot of the etched lines were supposed to be bevels, which was hard to do with foam that was a single piece. Recently, I decided to try and make it more correct, and have the proper look of the in-game model. After the success of the quick-built M-99 Saber, I decided to give it a proper shot. I started by making my own set of blueprints, making some small adjustments where I knew I had problems with the previous ones I had made. Then I got to work, cutting out the core with the 1" thick foam. 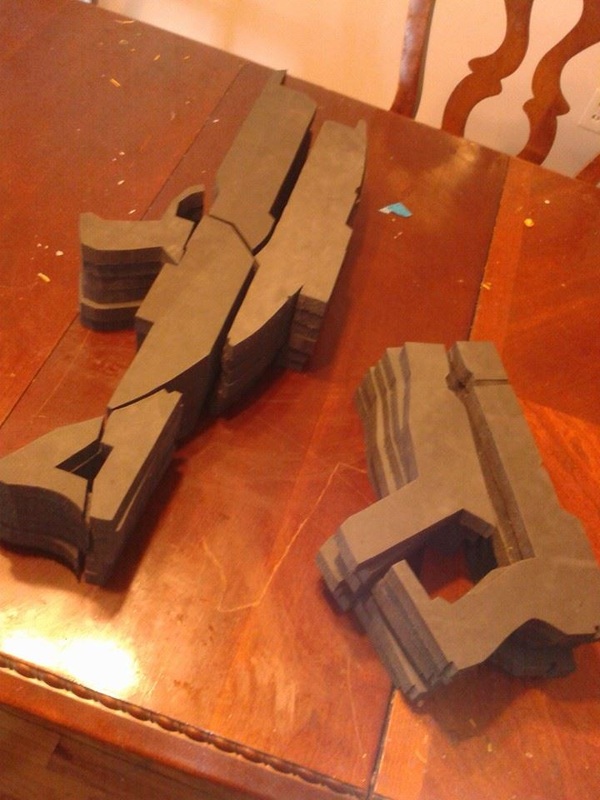
I prepped 5 of them, in case the build was a success (and to finally get ahead of the orders). Still treated the core like the puzzle I usually did with the previous version, since those fit into the band saw better. I also tried something new here, gluing all the pieces together with contact cement rather than super glue. Much better bond - those pieces will never separate! Once that was all together, I cut apart the blueprint even more, for the layered 1/2" foam. 
Already it's looking better, and closer! I left a bit of overlap on the top and bottom, to account for the barrels. Once the blueprint was cut out to my liking, it was a simple job of getting it to the 1/2" foam, cutting it out with the band saw, and using the disc attachment on my belt sander to get the bevels done. I still curved the top pieces with the router, though that was quite a bit scarier as I had to do them a piece at a time with a guide stick. In the previous one I had plenty of protection from the router bit with the 4 layers of foam, but with this I was a lot closer to it. I survived though, and this was the result: 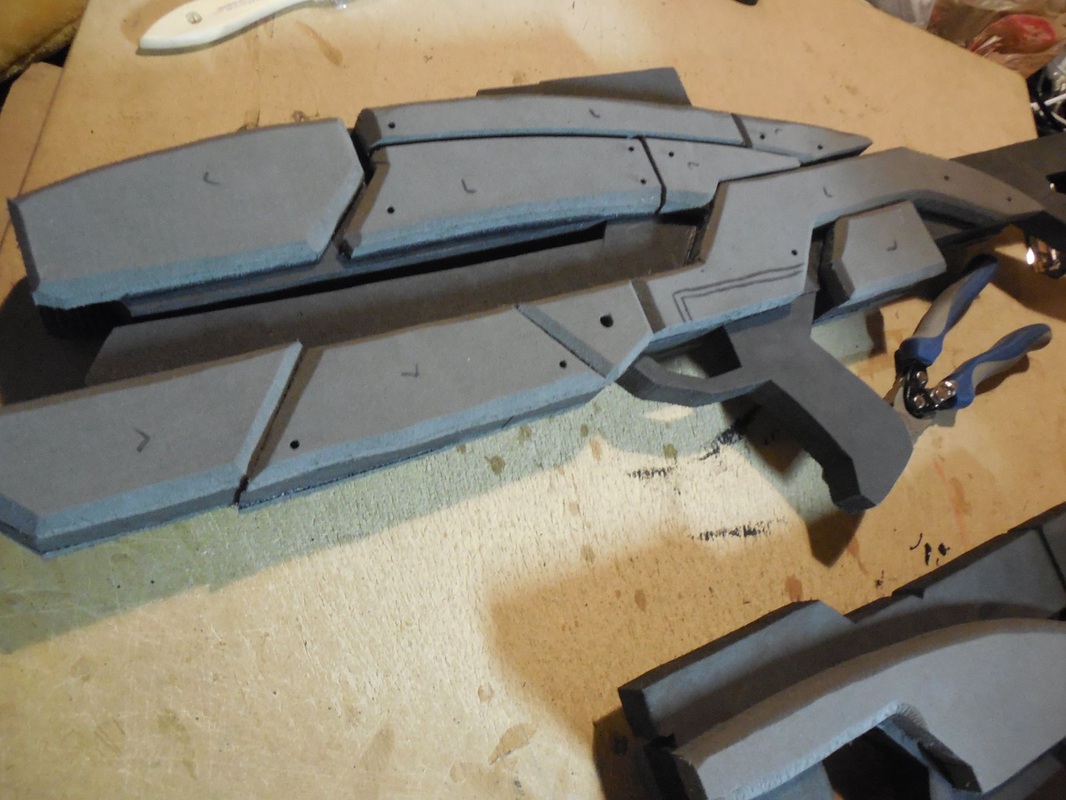
So super stoked to see this. I used my new drill press to punch in the rivet holes, then the xacto knife/heat gun trick for the etched details. Still used the wood burning tool for the air vents and such, though. After that I threw on the barrels, sight, and craft foam raised details, and off to the Plasti Dip it went! 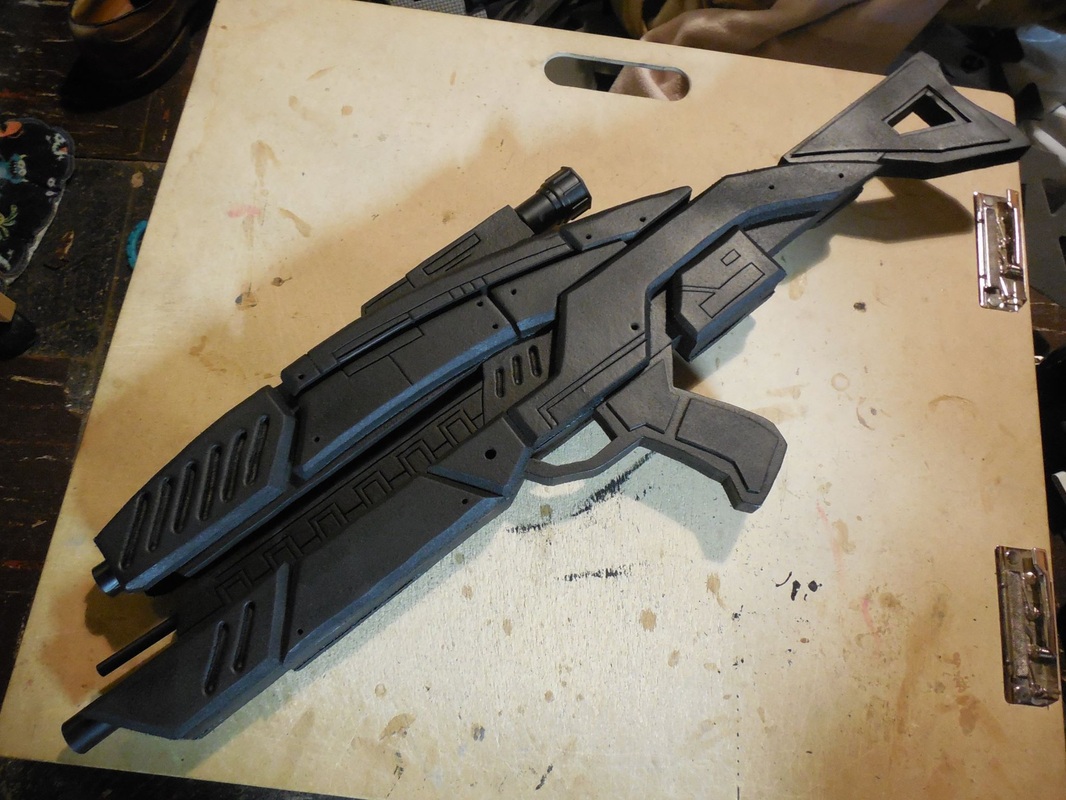
Holy. Crap. I almost stopped right there, it was exactly how I wanted it to turn out. Can't finish it there, though, so I pulled out my acrylics and started painting. 
I used some excess vinyl stencils that once held the stickers I used in the previous Avenger builds, which I was now out of (yes, that popular of a prop - at least 20-25 M8s worth). After that came weathering and a clear coat or three to seal it all. 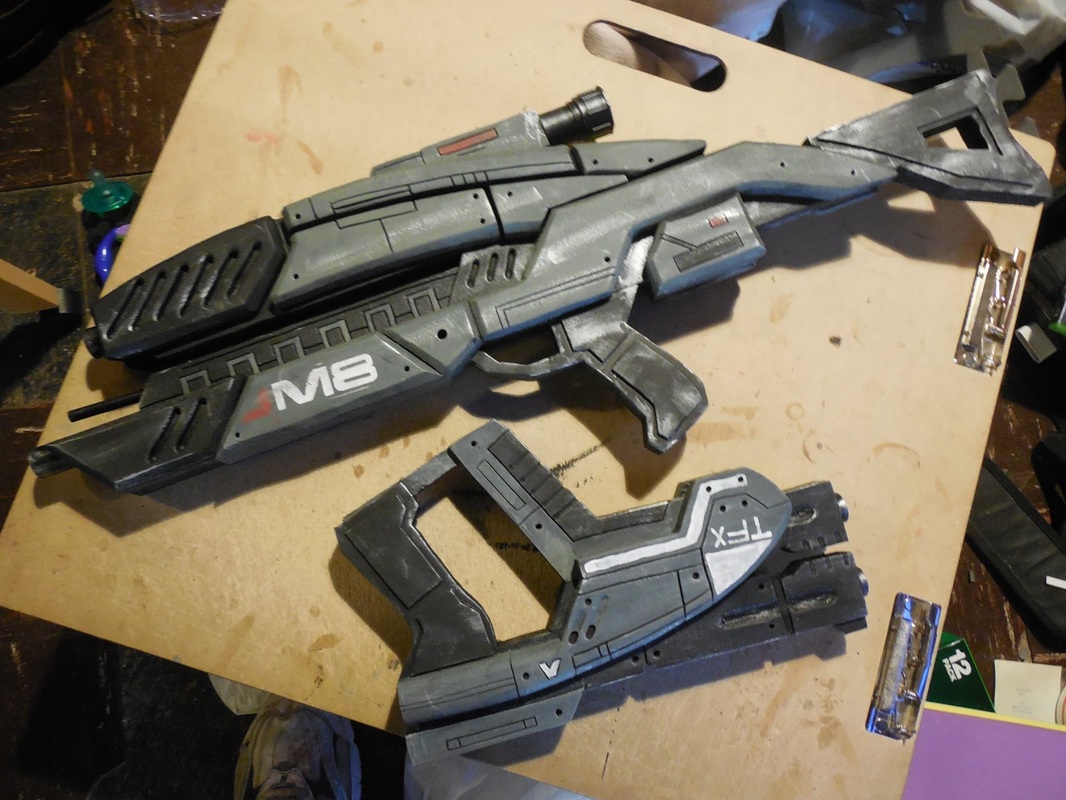
I am so happy with this new version that it will now be my regular build. I'll most likely use this same method and make a master out of MDF, mold a few, see how that turns out, but for now this right here is the version I have been trying to get to. It's really nice seeing the progression of skill level, from the first, to the one that really put me out there, to this newest one that is the most correct version I've made. I hope you guys enjoy it as much as I have! Here's some final pictures to show it off some more. ;) 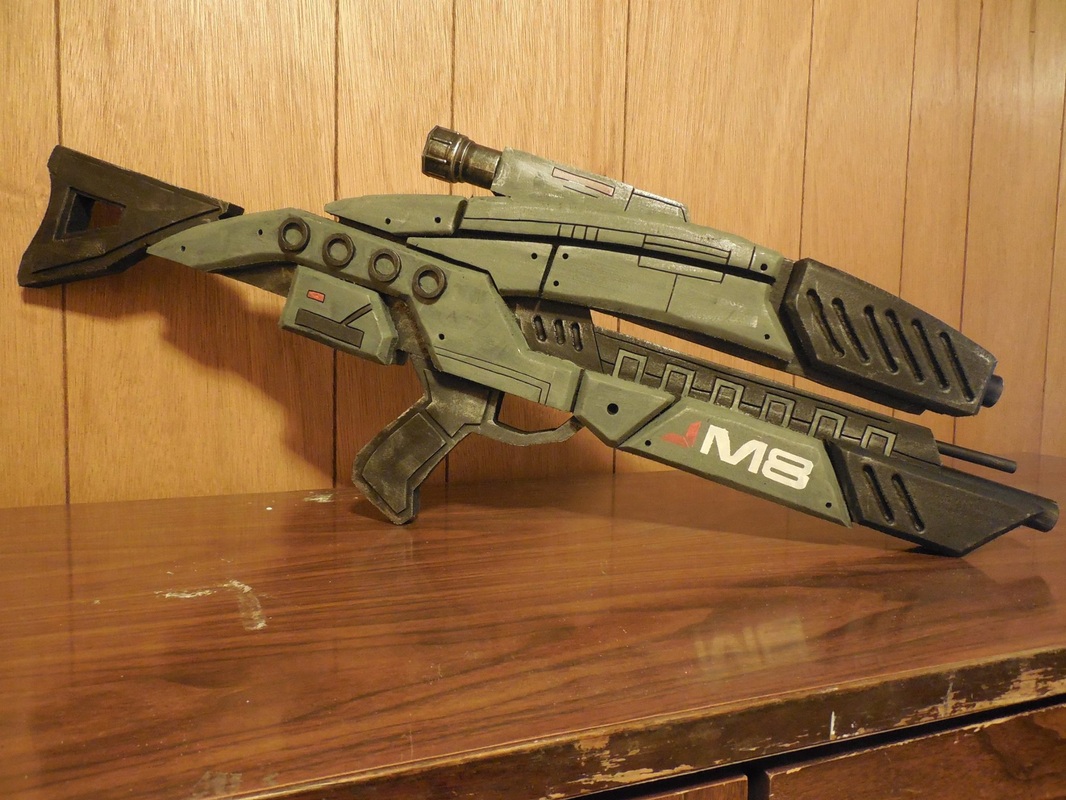
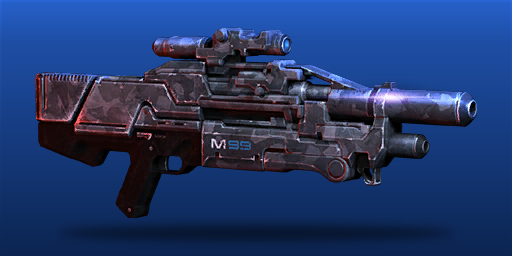
Moar Mass Effect! Haven't done a new gun build in a while, and this one had a really close deadline. Unfortunately that meant this turned into a quick build, and I had to cut a few corners (and things got a little bit sloppy unfortunately), but let's go! (Also, this build does not include the scope pictured in the preview shot above, since that's an optional attachment.) This build started in the usual way, with one new method. 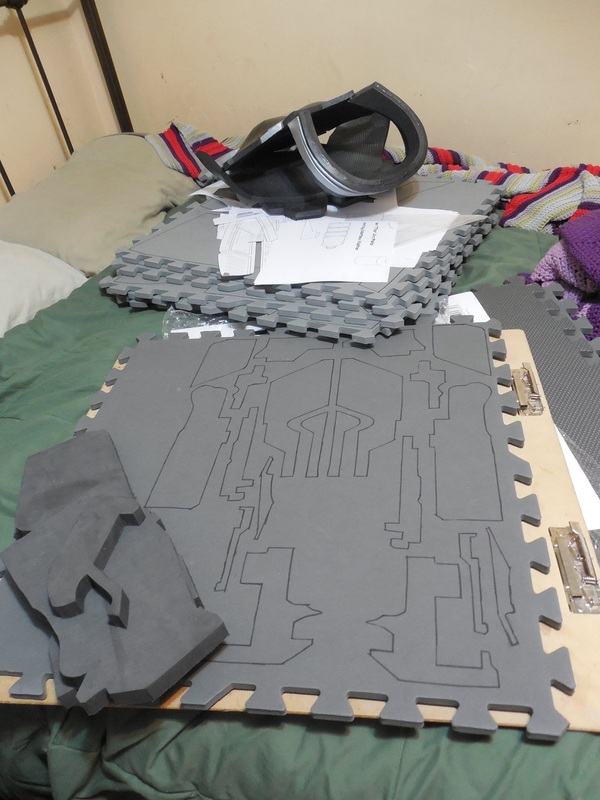
Decided to try using some of the 1" foam I got as the core of the Saber. For the outer bits I still used the 1/2" foam. A little different from the puzzle sections I do with the M8 Avenger, but got pretty much the same result! Assembled all the pieces as per usual: 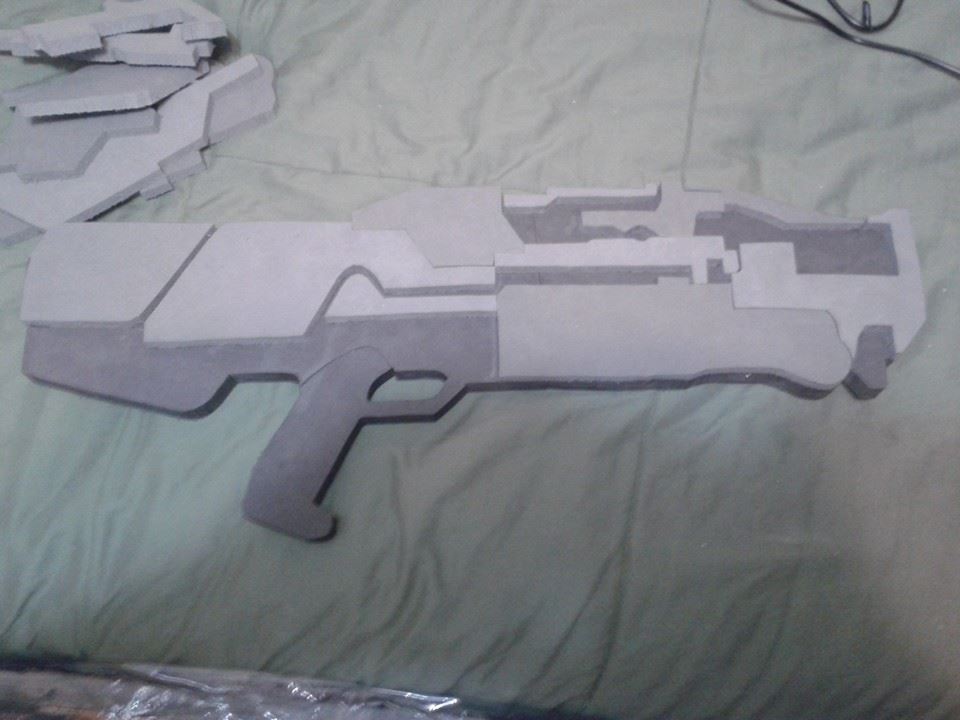
Blocked out all the detail lines, then tried out a new method to etch them in. Instead of using the wood burning tool like previous builds, I lightly scored the lines in with an xacto knife, then used a heat gun to spread the lines out. Much cleaner line, and looks nicer in the end. 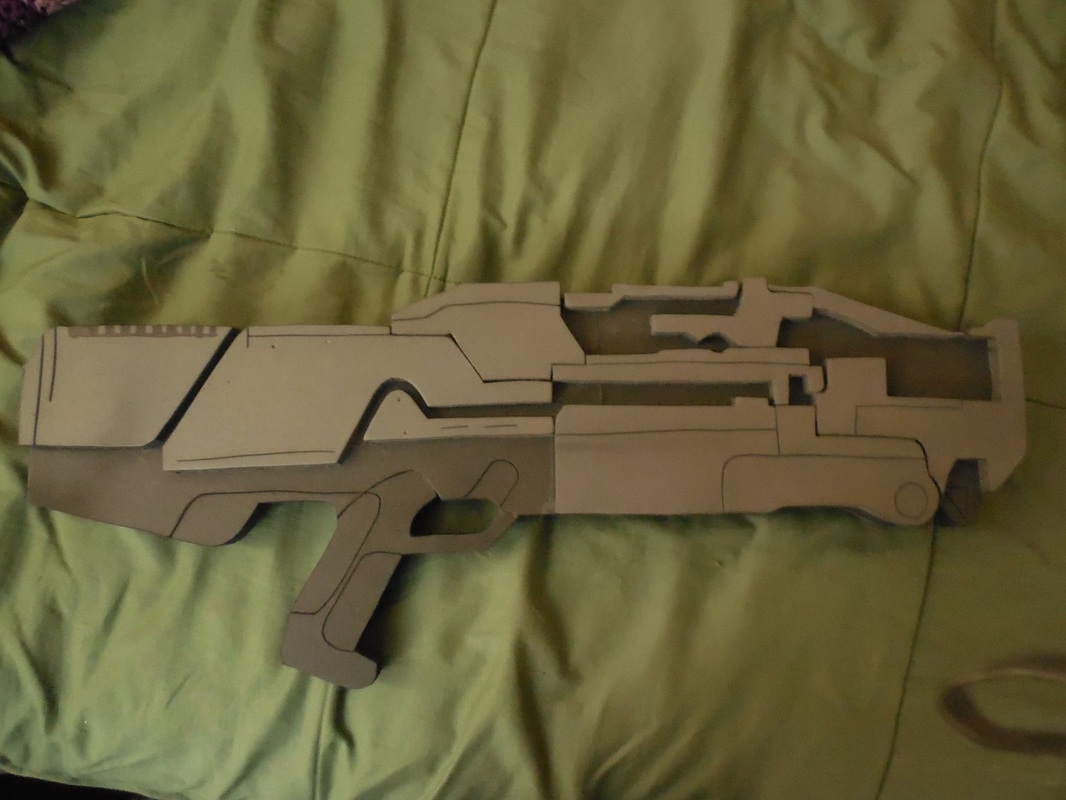
Still pretty sloppy though, since I was in a major rush, but passable. Once all that was etched, I took it to the band saw to cut in the slots on the stock, and cut out the barrels from PVC pipes. Then it was right on in to the Plasti Dip! 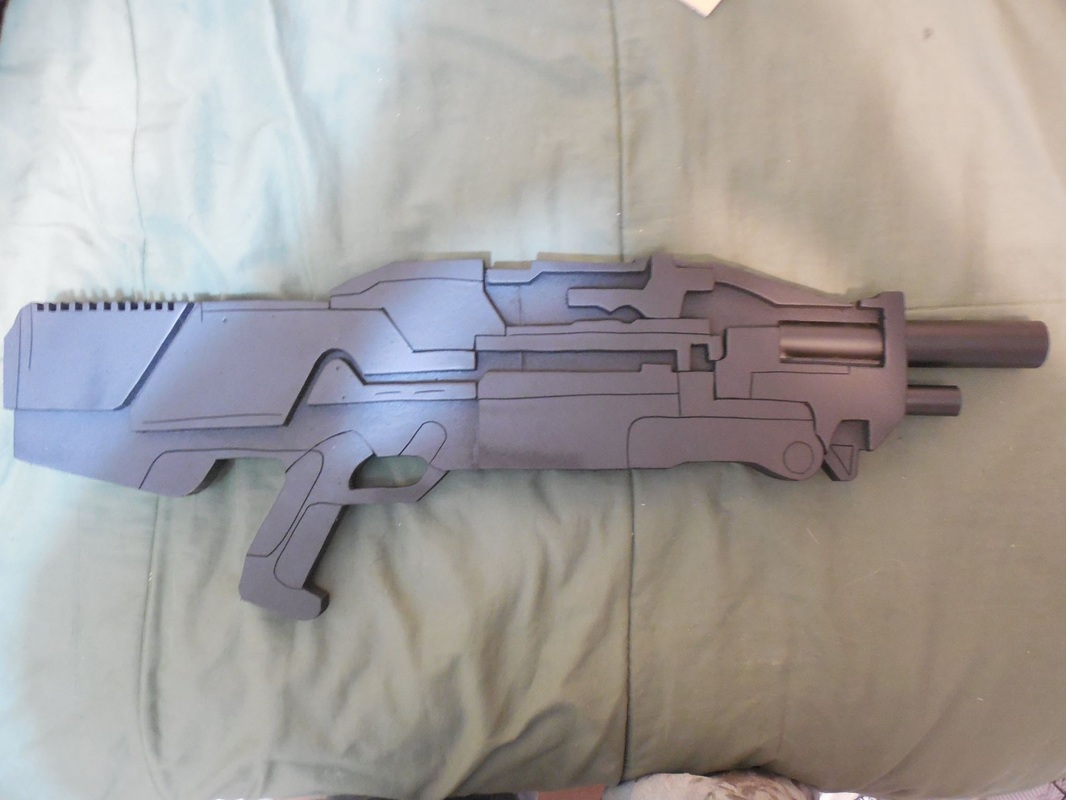
Since the upper barrel is the main part of the gun, rather than being the segmented sections (see the preview pic at the top again), it was a bit harder to blend it all in properly. Still, I wanted to keep the look, so I cut another PVC pipe section, then cross-cut a slice off the side, long enough to fit in the trench and simulate the barrel continuing down further. Not pretty, but again it worked. After that was all dry, I taped off the grip and lower stock, then threw on some silver. 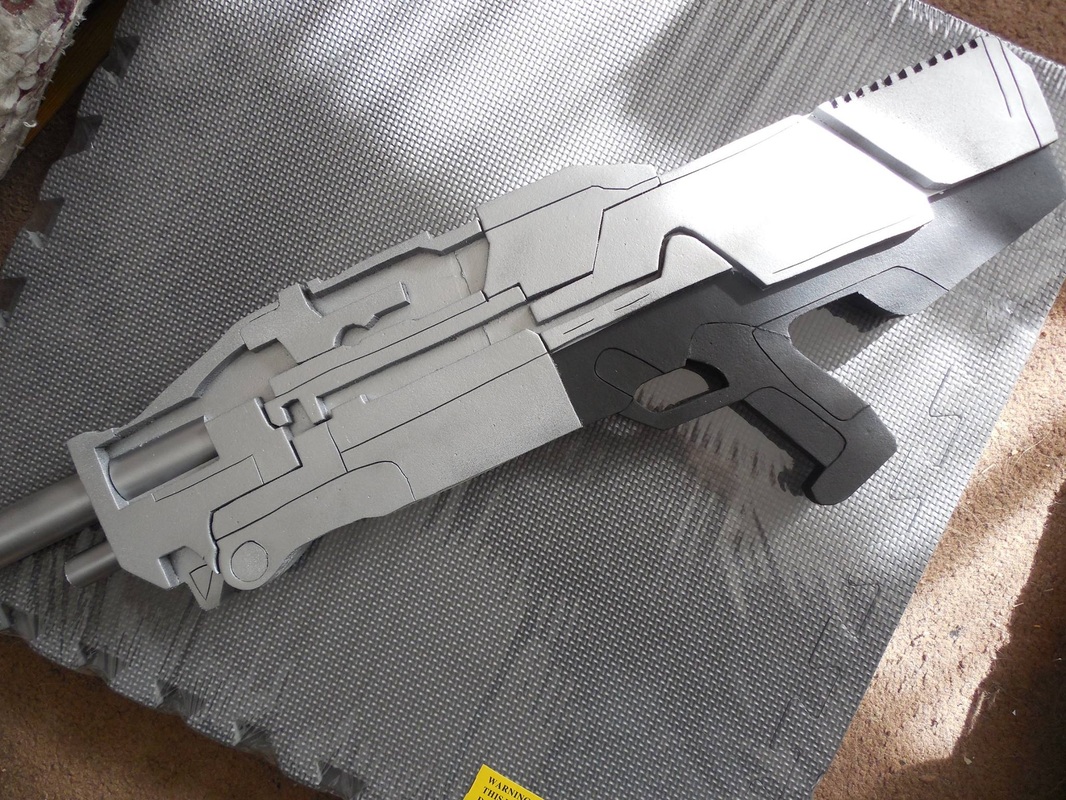
Coming along nicely, but waaaaay too shiny. Weathering time! Did a black wash on the silver area, similar to how I did the AC3 Tomahawk, and a silver wash and dry brush on the black area. 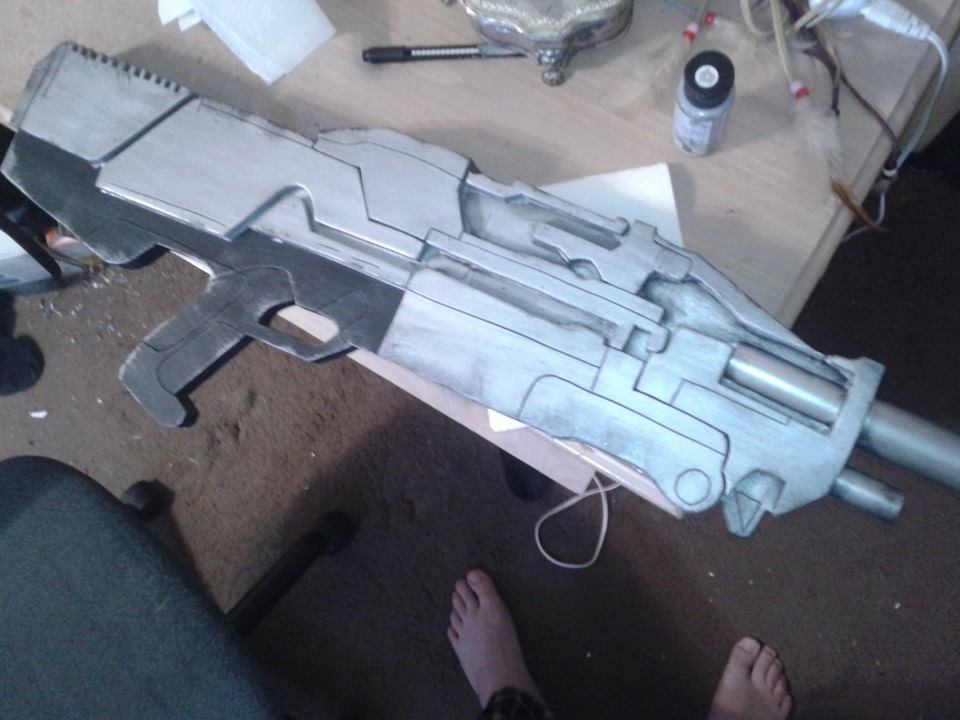
Muuuuuuuch better. Quick-painted the M-99 onto the side (should have made a quick stencil, but was in a rush). 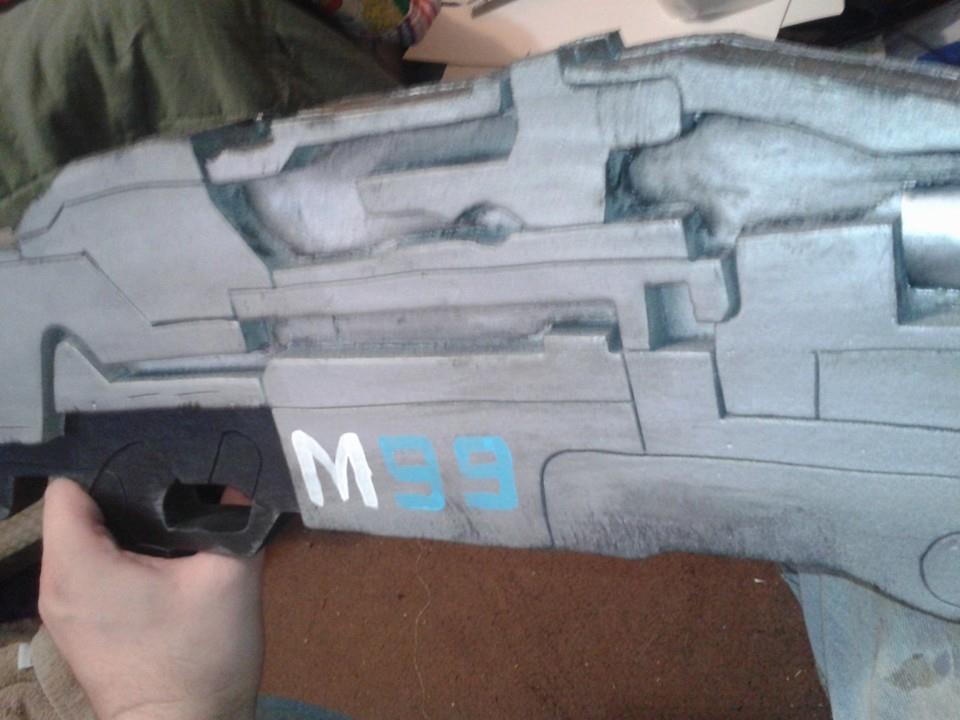
Couple of quick clear coats to seal it all in, then boxed it up and shipped it. Didn't have time unfortunately to get any finished shots of it, I was cutting it that close. Did get a lovely surprise though from the person it was for, in the form of one of the awesomest mashup cosplay shots I have ever laid eyes on! 
Mass Lolita! Isn't that the coolest thing you've ever seen??? :D
She was super happy with the rifle, despite the rush job, and her outfit was a big hit. I'm still trying to pick my jaw up from off the floor after seeing the picture. Sooooooooo awesome!  In the large mass of things to build from the Ninja Turtles '90s movies, I was asked to make Shredder's spear from the first movie. This was another simple build, though I used some new techniques (and tested out my size comparison-ing) that really made things fun. First off, had to get some more 1" dowels after finishing the 'chucks, since they took up a bit of the third dowel and all I had left was enough for the spear points. Not a big deal. 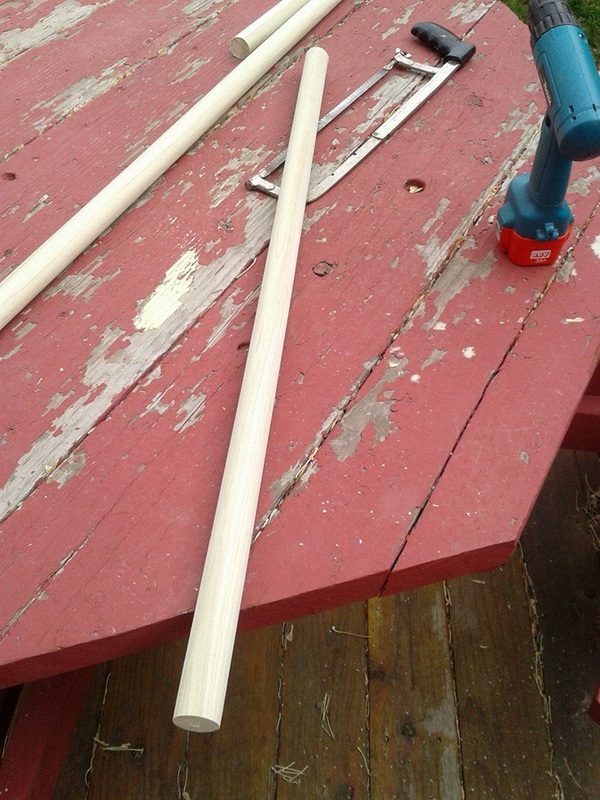 More hacking! Chopped a couple 13" long sections off the dowel, drilled a small hole on each end, and prepped a small scrap chunk of the other remainder to test out my brand-new lathe. 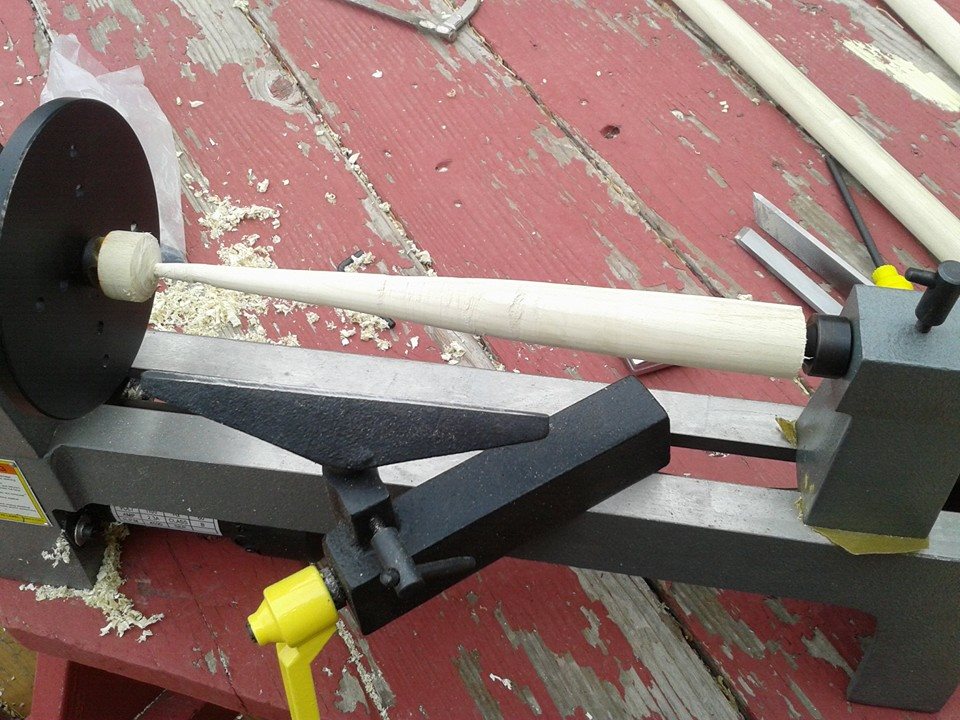 The test piece wasn't perfect, but it was literally the first time ever that I had used a lathe. The shape was there, but lots of rough spots to clean up and it wasn't very even. Taught me a ton, and was quite a bit of fun! And no, all you lathe users, I didn't leave the cross bar that far away - just moved it for a better picture. Trudged on, tested some more on the piece, then bit the bullet and spun out the actual spear heads.  A lot smoother, but I still had to clean them up quite a bit with sanding. Also don't have the right chuck to pop the end chunks off, so ended up cutting those off and cleaning up the rest with my belt sander. In the meantime, I cut the staff section to length, around 3 and a half feet. The spear in the movie wasn't very large, and since the spear heads were so long I needed to compensate. (Still think mine ended up bigger than the movie prop, but that's okay). I also drilled a hole on each side, so that when it was time to attach everything I could secure the heads a bit better with a small dowel, kind of like I did with Caliburn. I decided to use another stain, a dark cherry color, for the staff. Since I was using wood, it would be a better match to the color and sheen of the movie prop, which looked like glitter paper or something over a length of PVC.  I kept the spear heads rounded a bit, so that it was a little safer for conventions and whatnot. I sanded these as smooth as I could get them, then primed and painted them a brilliant metallic silver, again to match the sheen of the movie prop. Unfortunately I don't have a progress shot of those, but here's the staff with its second coat of stain. 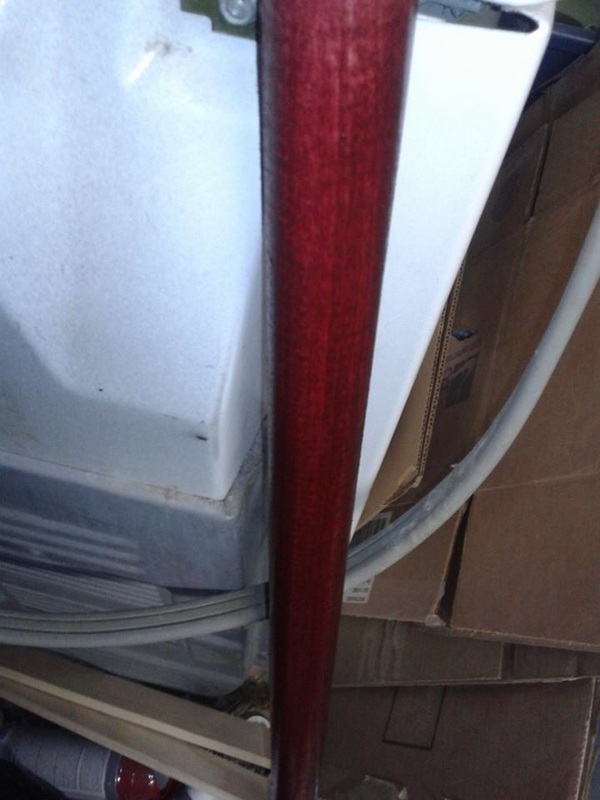 Really nice, super rich red. I was extremely happy with it at that point. Now, the reason I don't have progress pics on the spear heads, or for any of the rest of the build (save the final shot) is because of an accident. After two coats of the silver, I headed outside for the third and final coat. Our dogs decided to take that opportunity to push past me and run outside. Since it was mid November, we had ice all over the stairs I had to go up and down, and the push knocked me off balance and sent me flying. Landed hard on my leg and hip, as well as my back (which had been injured before, flaring it up in the process). Knocked me out of commission for a few weeks, nearly to mid December. Luckily that gave the pieces plenty of time to set, so after a week my brother kindly helped bring the parts in to me so that I could attach them all together. I was stuck in a chair, barely able to hobble around, but with his help I was able to get it all done. The finished spear: 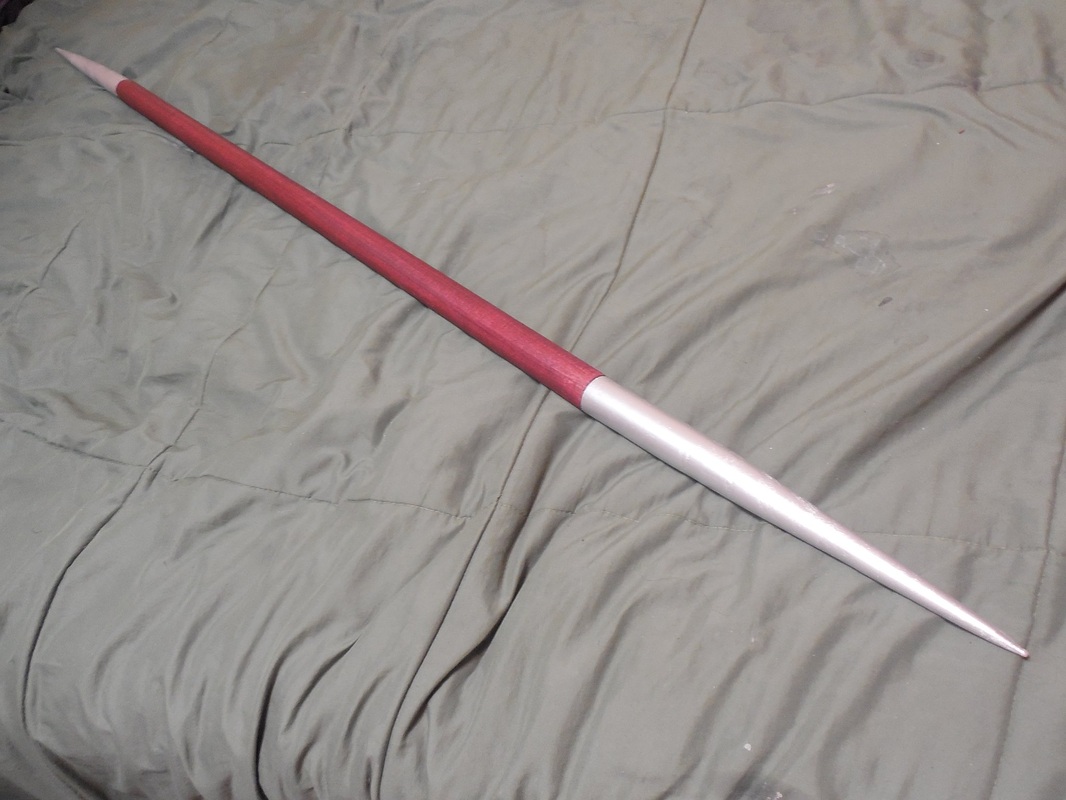 I'm really, really happy with how it turned out, despite the mishap near the end. So much so, that I may make another one for me one of these days. Learned a new skill and got a new tool too, so it all worked out! :D
|
|


 RSS Feed
